Limited Access Micropiles, Company Record 180′ Depth
As the 17-story Virginia General Assembly Building (VAGA) neared completion, it was determined that a pedestrian tunnel would be built across the Capital Grounds and enter the building’s basement. The proposed tunnel would enter the VAGA basement by first going through a preserved historic façade; however, the tunnel location would create a conflict. The proposed tunnel would conflict with a mat foundation supporting an existing 36″ deep beam and new column for the 17-story building. At one end, the mat foundation was in direct conflict with the proposed tunnel and had to be removed from service. Limited access micropiles resolved this issue.
The challenge and the solution
The new tunnel had to pass through the existing beam while 17 stories of building load was maintained on the column. A new foundation had to be installed along the beam so the contractor could shorten the beam and provide tunnel clearance. Due to the limited access in the basement, the new foundation system was determined to be a micropile supported pile cap. Micropiles are drilled deep foundations that can support very high loads (up to 400 kips are common).
The concept made perfect sense, but getting it done was another matter. Access was extremely difficult
Access
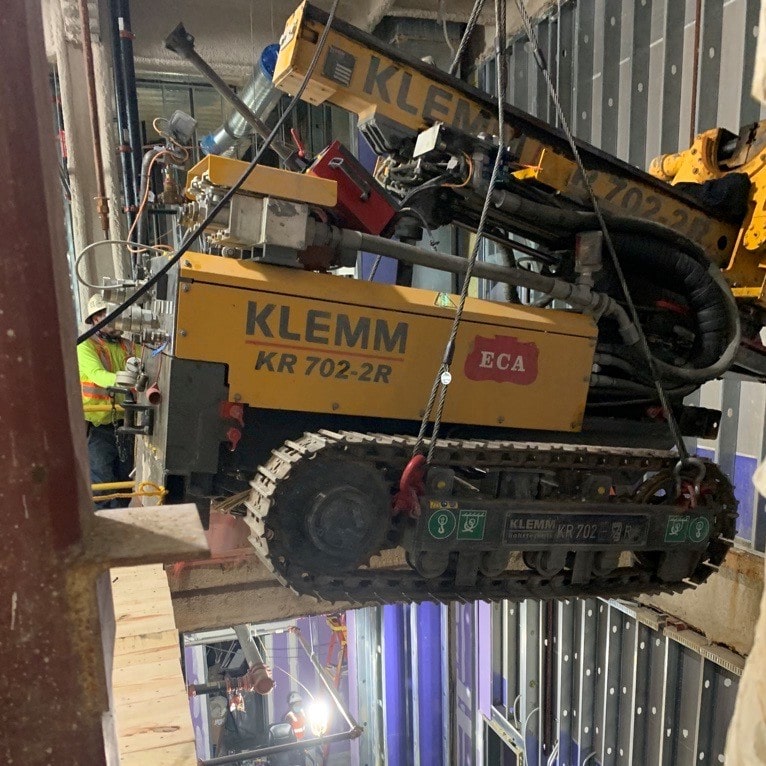
The next challenge we faced was to get a drill rig into a nearly completed basement especially when there was no direct access. To reach the micropile locations, the drill had to walk across an elevated slab, be lowered through a basement opening with a 10,000 lb. capacity gantry crane, then be towed down a hallway, and finally be raised onto a 5′ elevated slab on grade. Not an easy task, especially inside a building undergoing interior finishing!

Lowering Drill Rig Into Basement
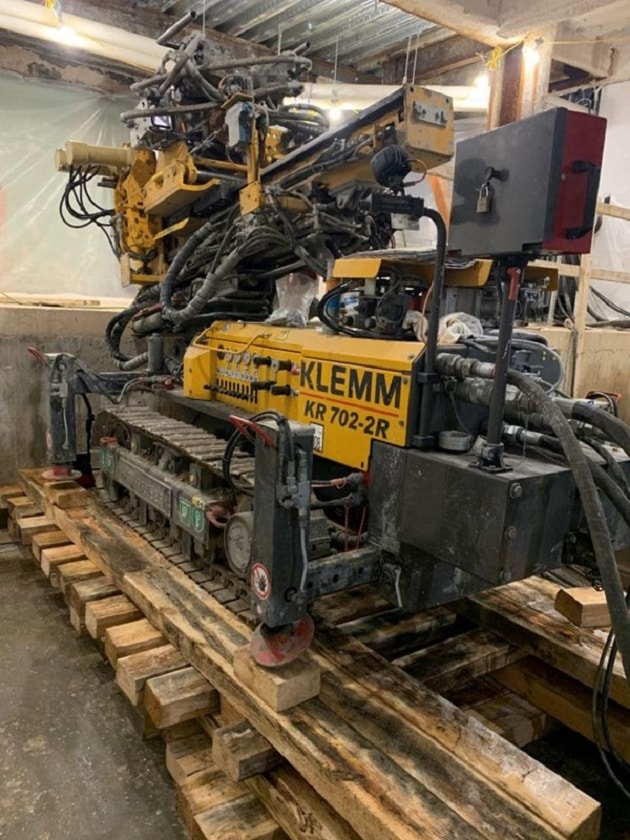
The first step was to partially disassemble the rig below a weight of 10,000 lbs., then lower it into the basement. The partial disassembly and reassembly was done by the talented mechanics of Equipment Corporation of America (ECA). Once the rig was lowered into the basement, machine rollers were used to roll the drill rig down the hallway. The rig was pulled into place with a miniature electric excavator. The rig’s outriggers were used to raise itself onto a 5′ elevated slab on grade, the rigs home for several weeks. The outriggers would lift the rig a few inches, then cribbing boards were inserted. By repeating the process, the rig lifted itself 5′ and into position.

Rig Climbing Into Position
Soil profile
The ground conditions we were facing had to be considered first. The ground profile consisted of 100’ of coastal plain fat clay underlain by 60’ of silty sand before encountering Granitic bedrock. Consideration was given to bonding the piles to the soil, but there were two concerns. Bonding to the clay could potentially lead to creep and poor performance during micropile loading. The other concern was extracting the casing in low overhead conditions to bond to the soil. If there was an interruption in removing casing, the grout would cure, and the pile location would be lost – not an option in the basement as there was no place to relocate a micropile. Hollow bar micropiles were also considered but with the drilling depths expected, this option was scratched. With all these considerations, the team realized the best product would be to case the micropiles 160’ to the top of bedrock and drill a 20’ rock socket.
Limited Access Micropile drilling
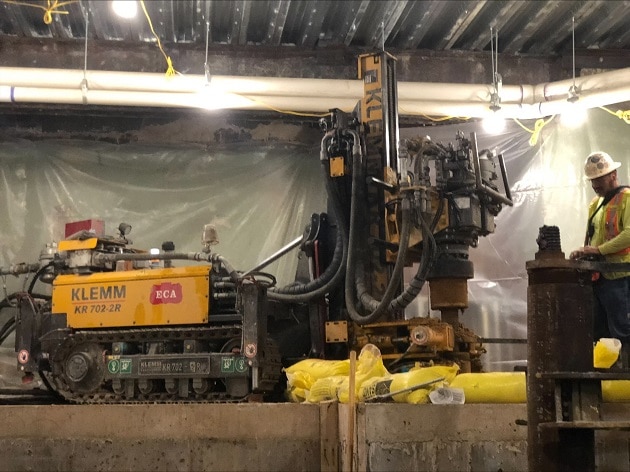
Subsurface elected to use nested casing to advance the limited access micropiles to the top of rock at 160′ depth. We advanced 9.625″ casing to a depth of 100′ then 7.625″ casing to a depth of 160′. The torque requirements to get casing to 160′ was reduced by using nested casing. Essentially drilling a 100′ hole, then a 60′ hole, as there was no friction on the 7.625″ casing for the upper 100′. Once bedrock was reached the 20′ rock socket was drilled to carry the design load.

Drilling Micropiles
Lock-off Limited Access Micropiles
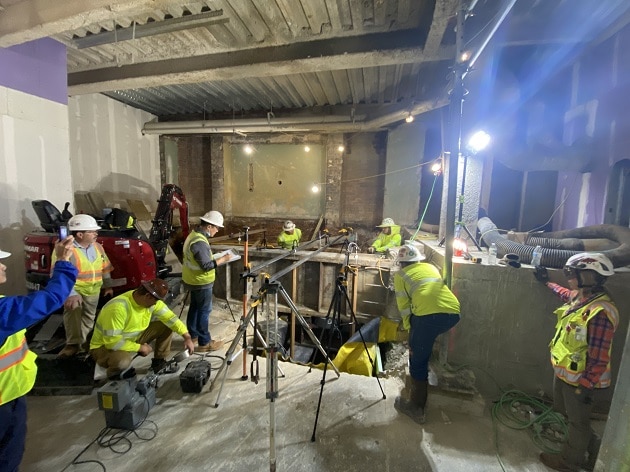
Once all four limited access micropiles were installed to 180′, Gilbane exposed the 36″ beam by demolishing concrete and excavating to the pile cut-off elevation. Subsurface then installed steel cribbing between the 4 micropiles and the 36″ steel beam. We then inserted a 2,000-kip 2″ pancake jack between the cribbing and the beam which transferred the beam load to the 4 micropiles. Subsurface continuously monitored micropile and beam movement during the load transfer process. Once sufficient load was transferred to the piles, steel shim packs were placed to permanently transfer the load to the piles.

Loading Micropiles
Partners
Subsurface relied heavily on the expertise of Toby Anderson with ECA. Toby worked tirelessly in selecting a rig that could provide sufficient torque, drill in 9′ of head room, and be able to get below the 10,000 lb. weight limit to access the basement. The project was only possible by having ECA as a partner. Equipment Corporation of America
Gilbane was also a true partner through great communication with the design team and by advocating for test drilling to provide the drilling method and pile capacity. Gilbane also managed shoring the elevated slab for for drill rig access and managed the continuous removal of drill spoils. Gilbane Construction Company
