
Pit Underpinning
Pit underpinning is an old school way to achieve great results when you need a “zero lot line” shoring system against an existing continuous footing. When the proposed bottom of excavation (proposed back of new basement wall) is in line with the existing building exterior, you have a “zero lot line” condition.
Installation
The trick is to have decent soil conditions and to do a little bit at a time. We typically start underpinning once an initial 5-cut has been made, leaving a healthy bench of soil against the existing footings. We then excavate 25% – meaning we excavate one pit, then skip three future pits and excavate the next pit. Pits are often excavated 30″ to 36″ wide by 5′ deep.

Pit Underpinning – Getting Started
The pits are carefully excavated, being careful not to damage the footings.

Pits Dug Neatly
Pit Underpinning Preparation
For some pits, particularly those that are reinforced, the condition of the footing and soil must be closely monitored to ensure safety.
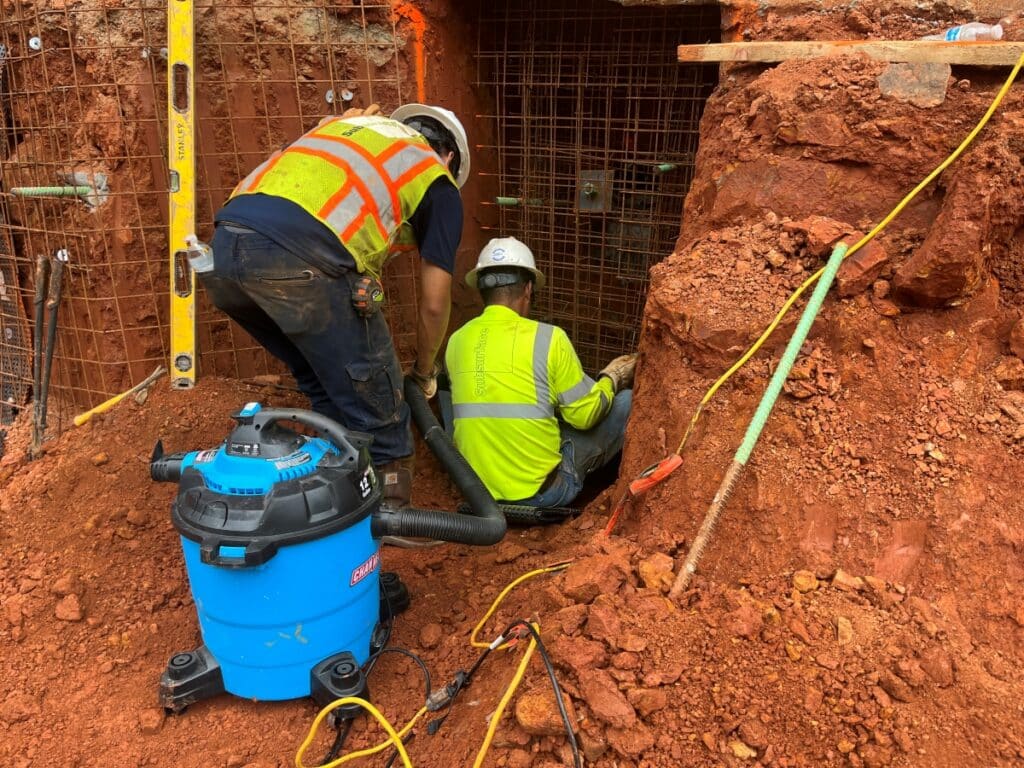
Preparing Underpinning Pit
Pit Underpinning Reinforcement
For many of our pits, soil nails are included to provide lateral resistance as the pits become “retaining walls” holding the soil behind them and under the buidling slab.
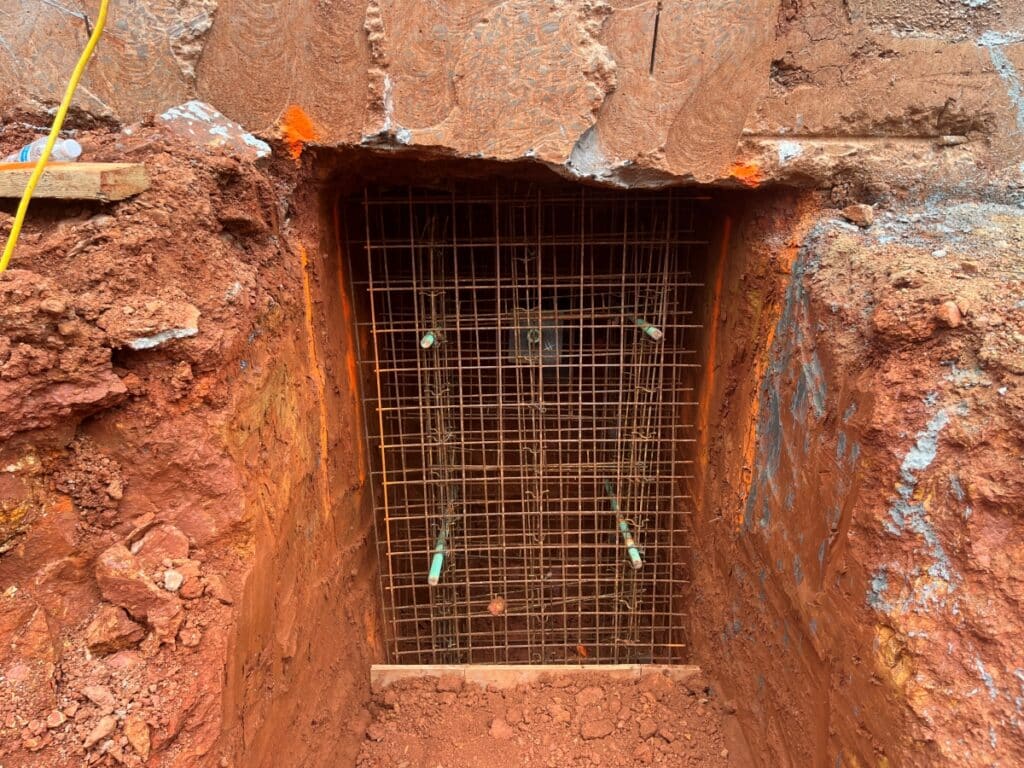
Steel Reinforced Underpinning Pit with a Soil Nail
Stages
Underpinning pits are all about careful planning and working in succession, bit by bit.

Packing with Non-Shrink Grout
For some projects where movement is of particular concern, such as a masonry historic structure, steps are taken to reduce movement.
Sometimes a space is left between the top of the pit and the bottom of the footing. A pancake jack is then inserted into that gap and load is put into the pit. Steel shims are then added to permanently transfer that load into the pit. The jack is removed, and the remaining space is filled with non-shrink grout.
More about Underpinning
https://www.subsurfaceconstruction.com/services/underpinning/